
We’ve been working hard over the past many months, at Ship Shape, on a cross platform menubar color management app called Swach, and as part of that work, we had a need to sign our app for both MacOS and Windows. There are many existing articles on doing this with Travis or Appveyor, but the documentation for using GitHub actions is lacking, so we wanted to quickly share what we learned.
MacOS
Getting your certificate from Apple
You will need an Apple developer account to generate a certificate. You can sign up at https://developer.apple.com/programs/.
Once you have a developer account, you can go to your account and click
Certificates, Identifiers, and Profiles to manage your certificates. Click the
plus button to add a new certificate.
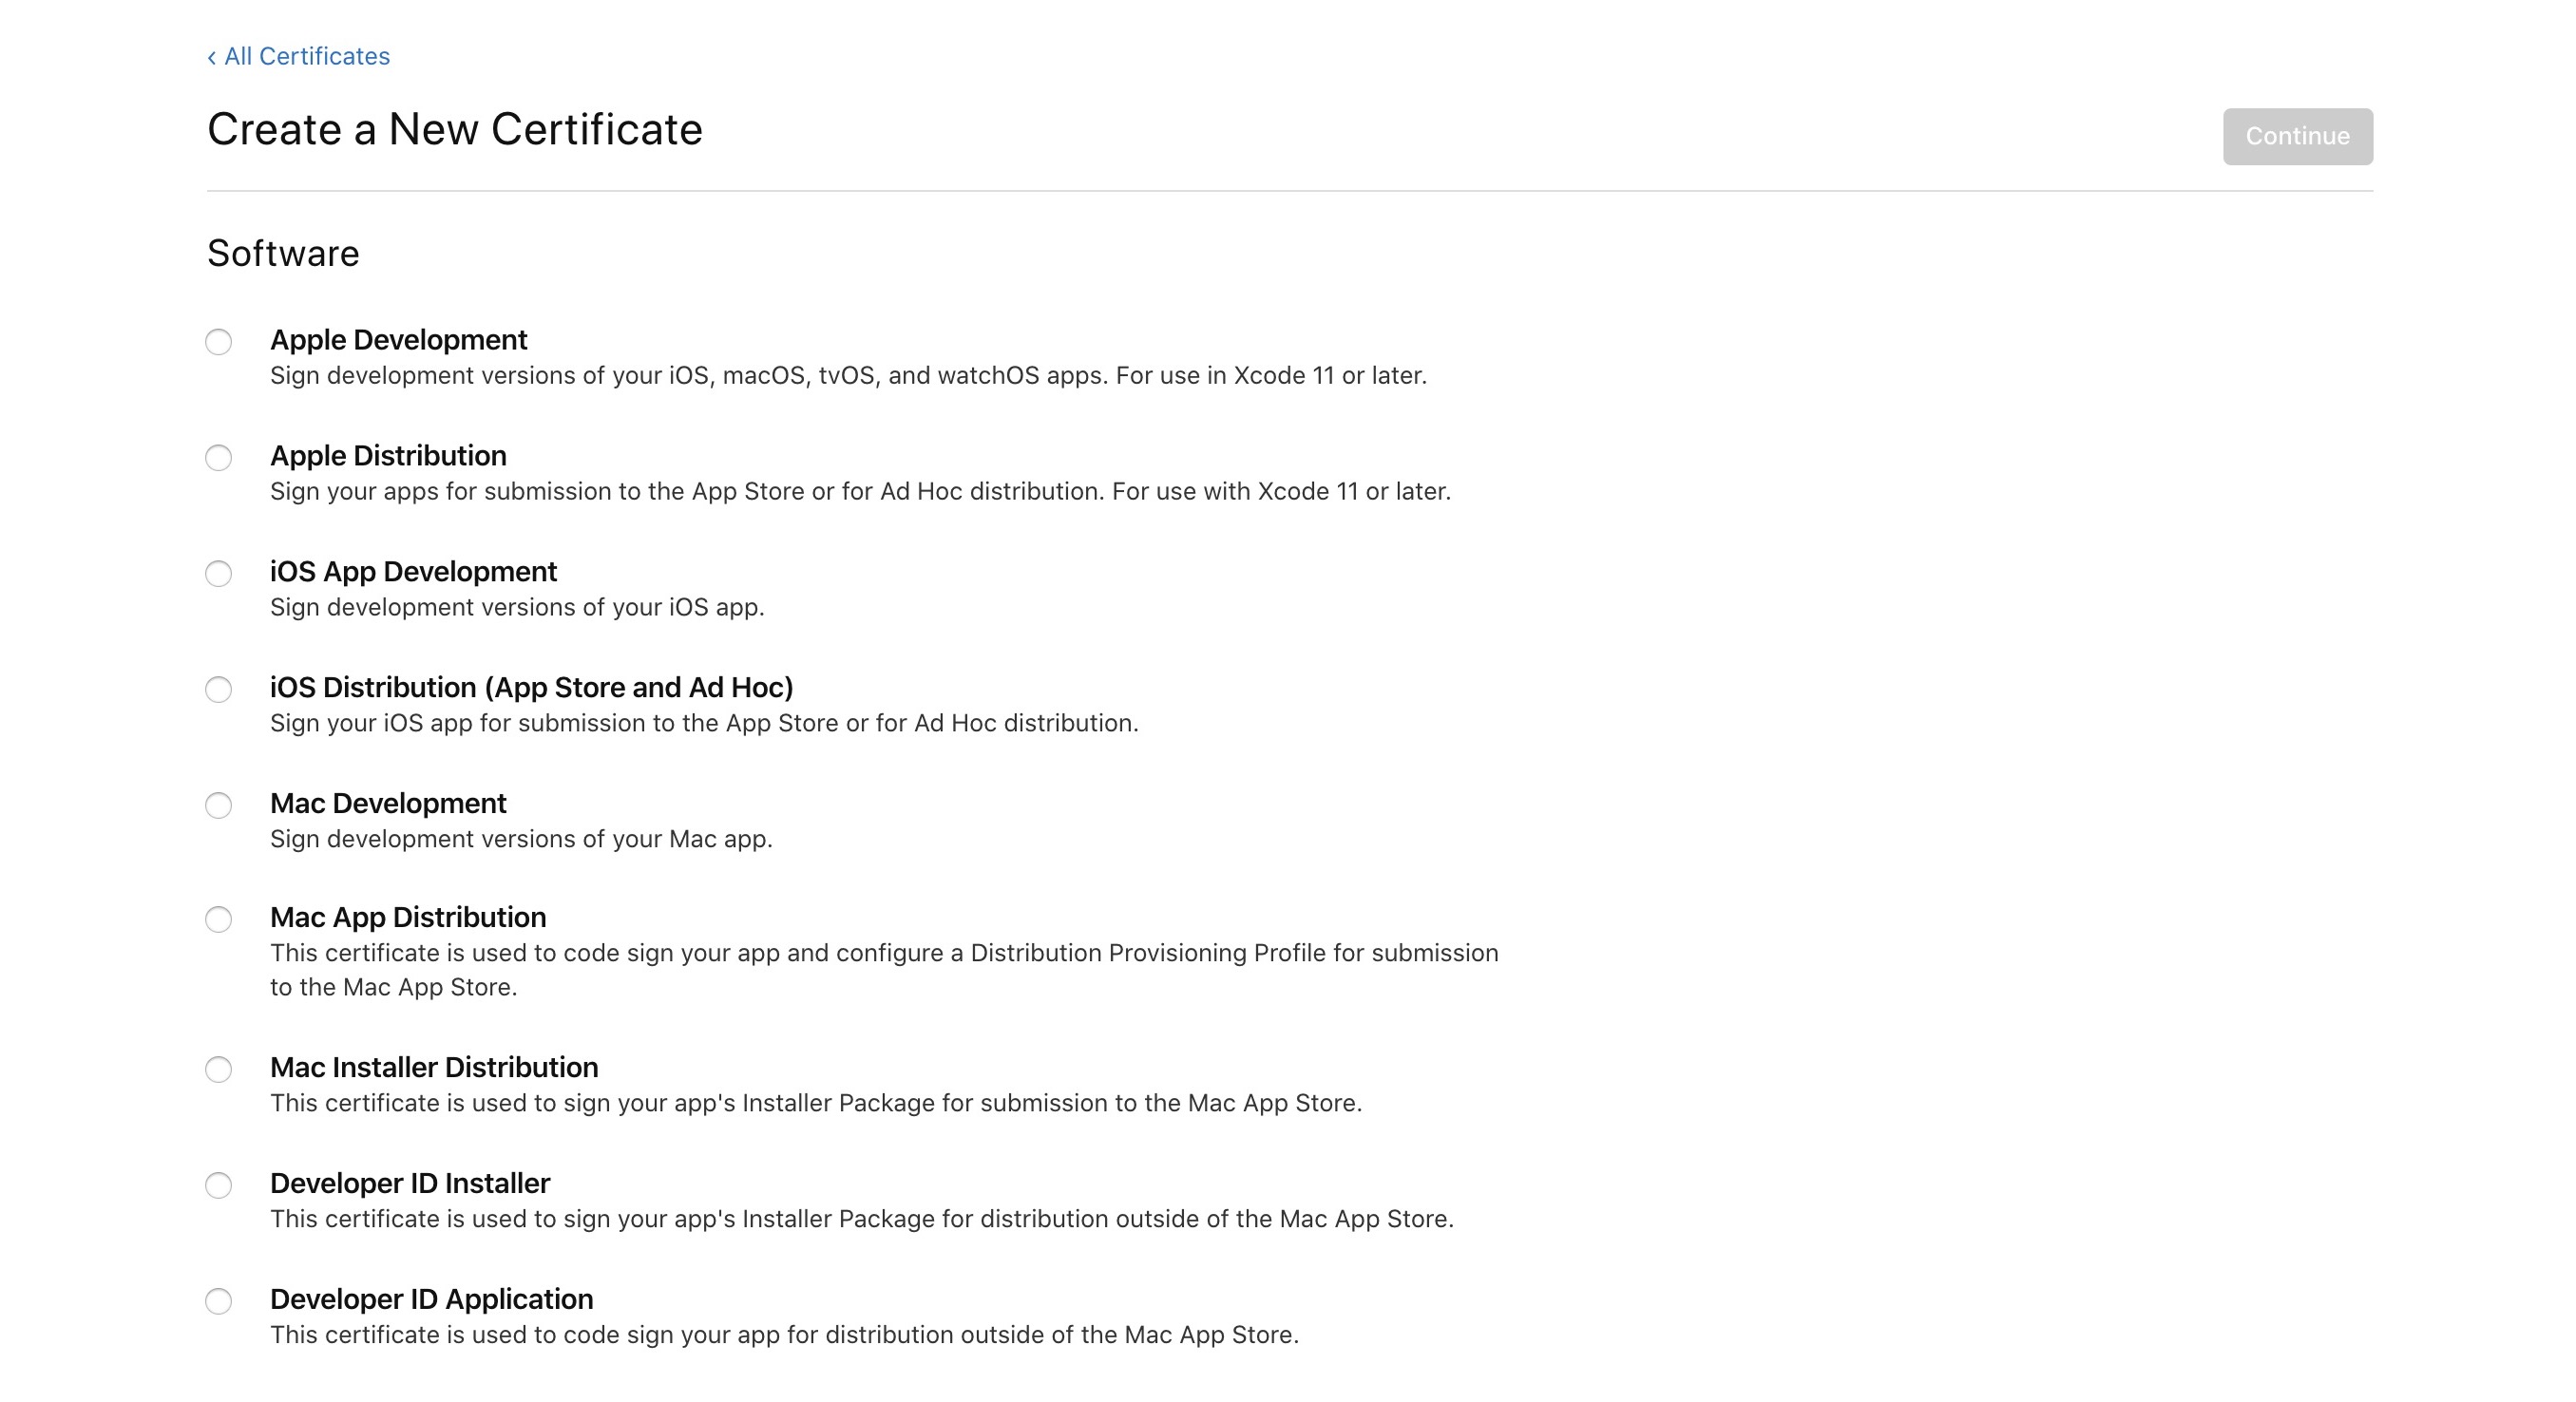
At the time of writing, there are 9 types of certificates, but we are only
interested in two. You will want to generate both the Developer ID Installer,
and Developer ID Application certificates, as both are needed to sign the
application and installer for distribution outside the app store.
Adding your certificate to GitHub
Once you have your certificates from Apple, you’ll want to export them as a
.p12, which we will then copy the contents of to save to GitHub as a secret.
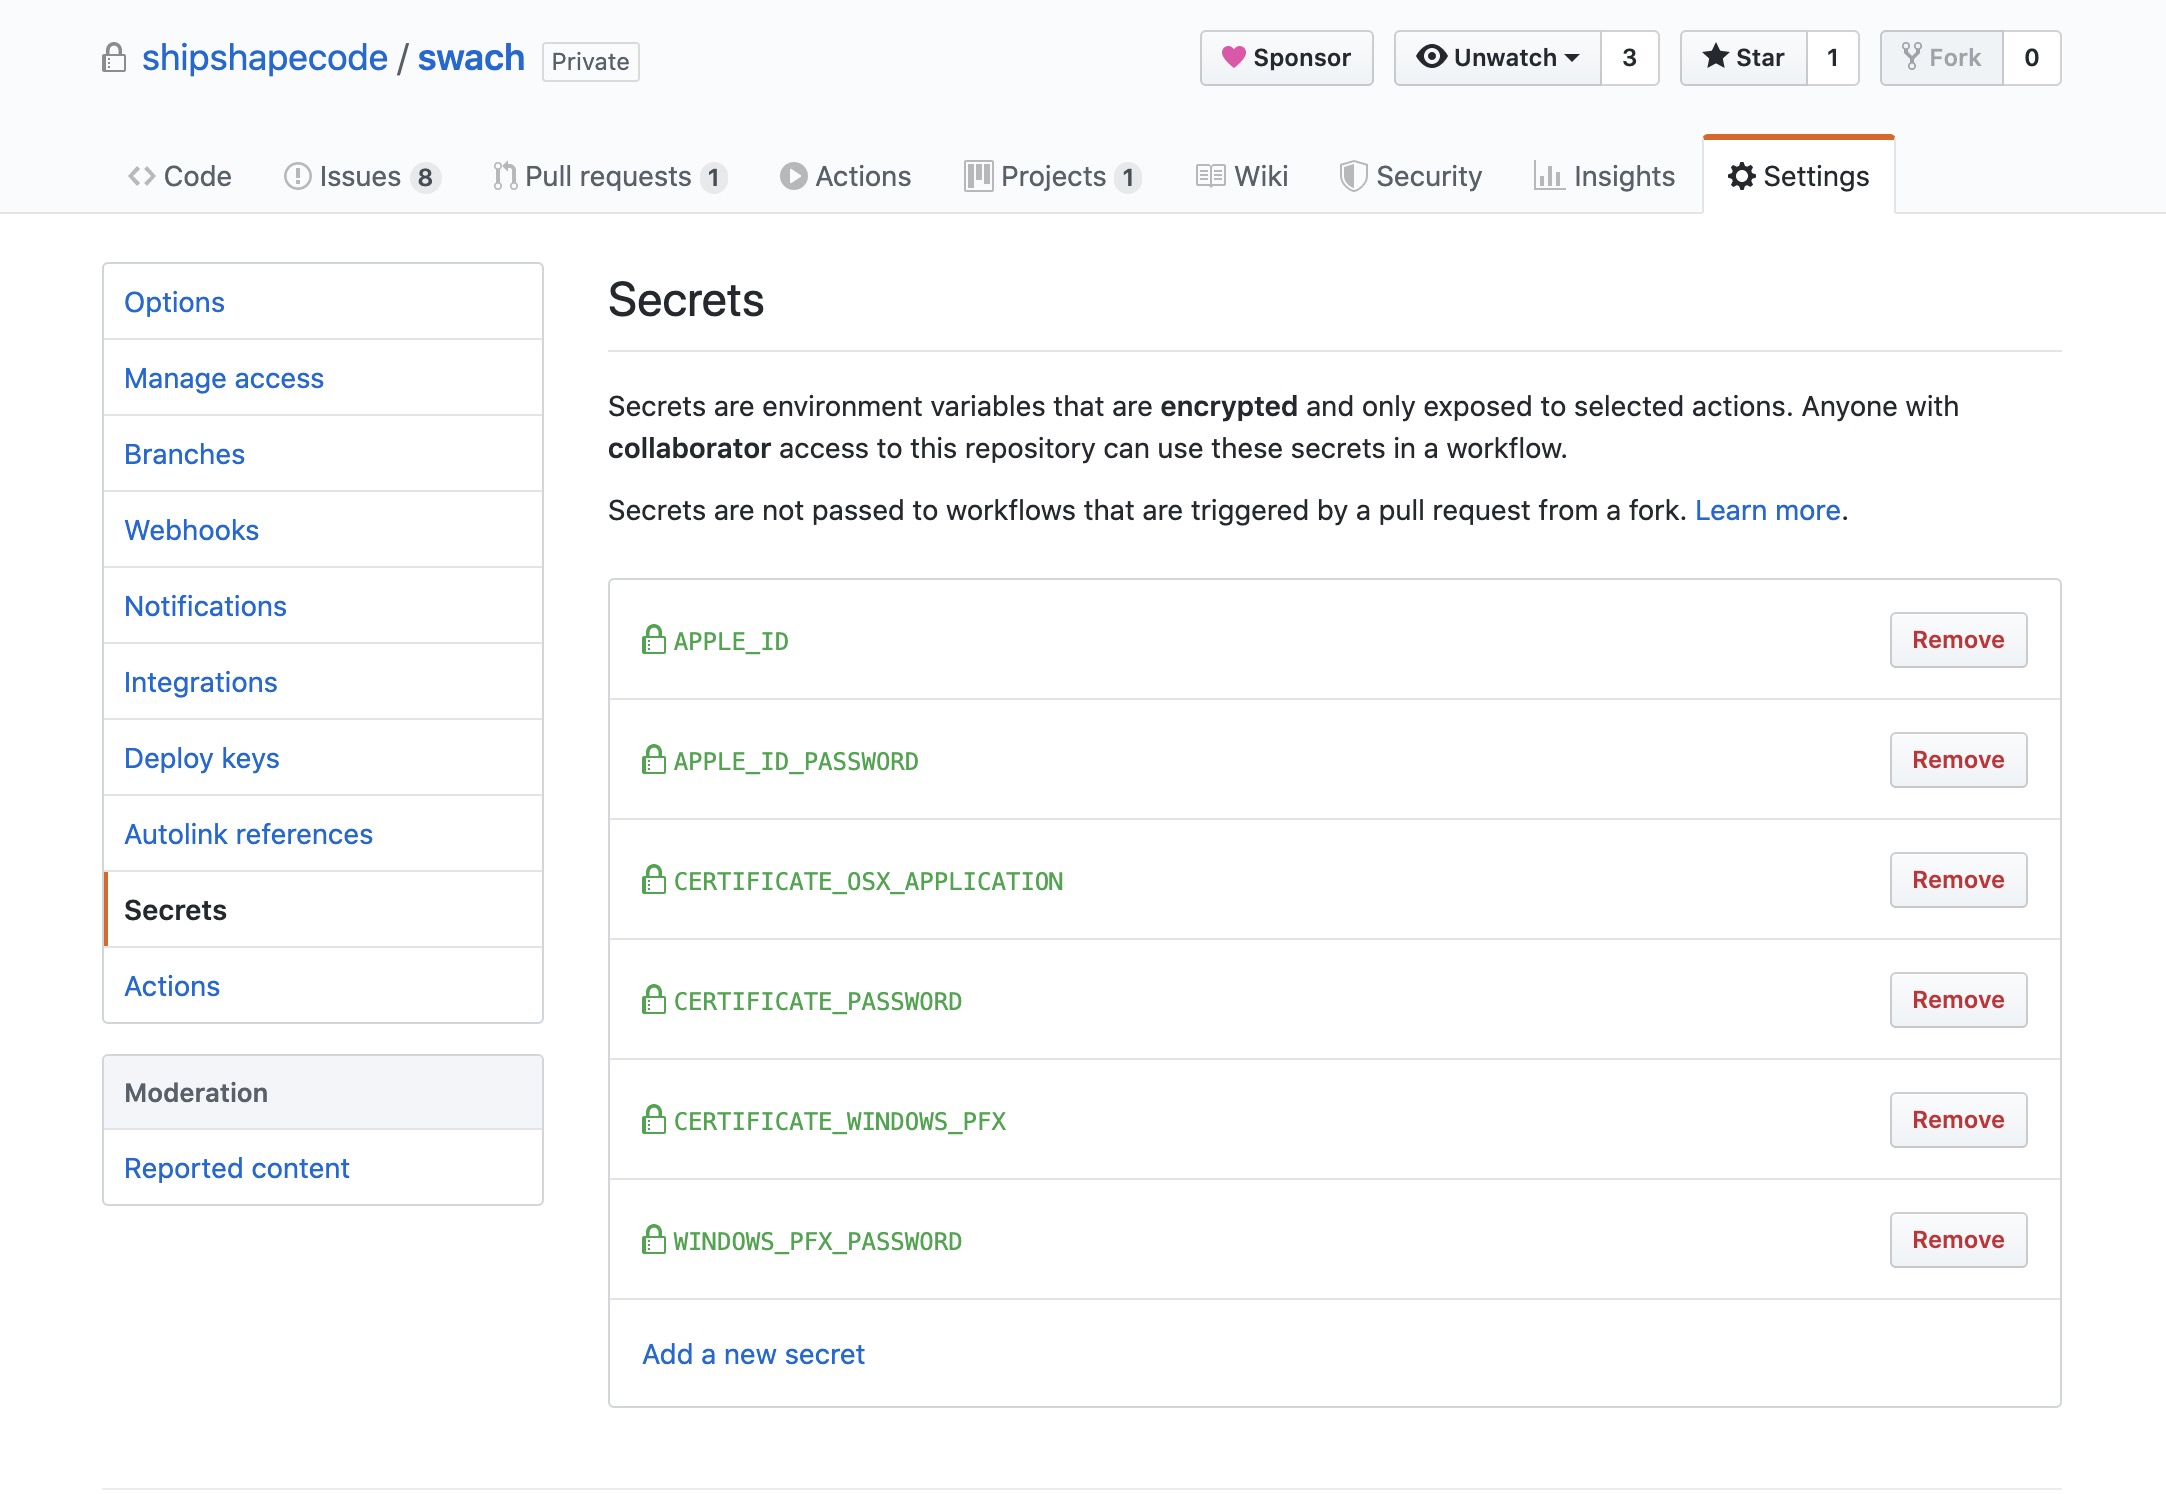
base64 -w 0 path/to/your/certificate.p12You will then want to copy your certificate output into a secret named
CERTIFICATE_OSX_APPLICATION, as well as the password you set for the
certificate to CERTIFICATE_PASSWORD.
Once the secrets are added, we need to write a script to get them into our keychain.
add-osx-cert.sh
#!/usr/bin/env sh

KEY_CHAIN=build.keychain
CERTIFICATE_P12=certificate.p12

# Recreate the certificate from the secure environment variable
echo $CERTIFICATE_OSX_APPLICATION | base64 --decode > $CERTIFICATE_P12

#create a keychain
security create-keychain -p actions $KEY_CHAIN

# Make the keychain the default so identities are found
security default-keychain -s $KEY_CHAIN

# Unlock the keychain
security unlock-keychain -p actions $KEY_CHAIN

security import $CERTIFICATE_P12 -k $KEY_CHAIN -P $CERTIFICATE_PASSWORD -T /usr/bin/codesign;

security set-key-partition-list -S apple-tool:,apple: -s -k actions $KEY_CHAIN

# remove certs
rm -fr *.p12
Calling the script in GitHub actions
You’ll want to create a step in your actions something like this:
- name: Add MacOS certs
  if: matrix.os == 'macos-latest' && startsWith(github.ref, 'refs/tags/')
  run: chmod +x add-osx-cert.sh && ./add-osx-cert.sh
  env:
    CERTIFICATE_OSX_APPLICATION: ${{ secrets.CERTIFICATE_OSX_APPLICATION }}
    CERTIFICATE_PASSWORD: ${{ secrets.CERTIFICATE_PASSWORD }}
This will call the scripts when you are running on macos-latest and add the
certs as env variables.
Notarizing your MacOS app
Apple now requires notarizing your MacOS apps as well. We use electron-forge for building our apps, which allows for notarizing as well, and our config looks like this:
packagerConfig: {
  asar: true,
  darwinDarkModeSupport: 'true',
  icon: 'electron-app/resources/icon',
  name: 'Your app name',
  osxSign: {
    entitlements: 'electron-app/src/entitlements.plist',
    'entitlements-inherit': 'electron-app/src/entitlements.plist',
    'gatekeeper-assess': false,
    hardenedRuntime: true,
    identity: 'Developer ID Application: YOUR NAME HERE (YOUR ID HERE)'
  },
  osxNotarize: {
    appleId: process.env['APPLE_ID'],
    appleIdPassword: process.env['APPLE_ID_PASSWORD']
  },
  packageManager: 'yarn'
},
You’ll notice the osxNotarize section which essentially just requires you to
set more GitHub secrets containing your APPLE_ID and APPLE_ID_PASSWORD to be
used for notarizing.
Entitlements and other settings
We found that additional configuration was needed to get our application running
as more than just a blank screen. We needed entitlements, as well as
hardenedRuntime and gatekeeper-assess, but these settings will vary
depending on your app. The entitlements.plist that we are using is:
entitlements.plist
<?xml version="1.0" encoding="UTF-8"?>
<!DOCTYPE plist PUBLIC "-//Apple//DTD PLIST 1.0//EN" "http://www.apple.com/DTDs/PropertyList-1.0.dtd">
<plist version="1.0">
  <dict>
    <key>com.apple.security.cs.allow-jit</key>
    <true/>
    <key>com.apple.security.cs.allow-unsigned-executable-memory</key>
    <true/>
    <key>com.apple.security.cs.disable-library-validation</key>
    <true/>
    <key>com.apple.security.cs.disable-executable-page-protection</key>
    <true/>
    <key>com.apple.security.automation.apple-events</key>
    <true/>
  </dict>
</plist>
That should be all you need for MacOS signing and notarizing via GitHub actions, but please let us know if you encountered any issues!
Windows
As with MacOS, Windows applications must also be signed, however Microsoft does not handle certificates in house, so you will need to get a third party certificate to use for signing. We got our certificate from GoDaddy, but see here for some alternative choices.
Once you get your certificate file, you’ll need to output it to .pfx and then
we will copy the output of that into a GitHub secret called
CERTIFICATE_WINDOWS_PFX.
base64.exe -w 0 <your-certificate-name>.pfxWe will also need to add the password for the cert as a WINDOWS_PFX_PASSWORD
GitHub secret.
We’ll then add a step to our GitHub actions of the following:
- name: Add Windows certificate
        if: matrix.os == 'windows-latest' && startsWith(github.ref, 'refs/tags/')
        id: write_file
        uses: timheuer/base64-to-file@v1
        with:
          fileName: 'win-certificate.pfx'
          encodedString: ${{ secrets.CERTIFICATE_WINDOWS_PFX }}
This will copy the base64 output to a file to be used by the Windows signing process.
Electron Forge allows you to specify the Windows certificate file and password
in the config for the Windows Squirrel maker, so once the file has been created
you should just need to add the following to your config.forge.js.
makers: [
  {
    name: '@electron-forge/maker-squirrel',
    config: {
      name: 'Your app name',
      certificateFile: process.env['WINDOWS_PFX_FILE'],
      certificatePassword: process.env['WINDOWS_PFX_PASSWORD']
    }
  }
];
That should be all the setup necessary to get your Windows certificates up and running!
Building the application
Once your certificates are all setup, you should be ready to build your application. For completeness, here is our entire workflow file for GitHub actions, which includes adding all the certs, signing, and building the project.
It will only run tests unless a new tag is pushed. When a new tag is pushed, it will build on MacOS, Windows, and Ubuntu, and push all of those release assets to GitHub.
name: Package and Release

on:
  pull_request: {}
  push:
    branches:
      - master
    tags:
      - v*

jobs:
  test:
    name: Lint and Test
    runs-on: ubuntu-latest
    steps:
      - name: Checkout
        uses: actions/checkout@v1
      - name: Use node 12.x
        uses: actions/setup-node@v1
        with:
          node-version: '12.x'
      - name: Yarn install
        run: yarn install-deps
      - name: Lint JS
        run: yarn lint:js
      - name: Lint HBS
        run: yarn lint:hbs
      - name: Get xvfb
        run: sudo apt-get install xvfb
      - name: Test
        run: xvfb-run --auto-servernum yarn test
  build:
    name: Build (${{ matrix.os }})
    if: startsWith(github.ref, 'refs/tags/')
    needs: test
    runs-on: ${{ matrix.os }}
    strategy:
      matrix:
        os: [macos-latest, ubuntu-latest, windows-latest]
    steps:
      - name: Checkout
        uses: actions/checkout@v1
      - name: Use node 12.x
        uses: actions/setup-node@v1
        with:
          node-version: '12.x'
      - name: Yarn install
        run: yarn install-deps
      - name: Add MacOS certs
        if: matrix.os == 'macos-latest' && startsWith(github.ref, 'refs/tags/')
        run: chmod +x add-osx-cert.sh && ./add-osx-cert.sh
        env:
          CERTIFICATE_OSX_APPLICATION:
            ${{ secrets.CERTIFICATE_OSX_APPLICATION }}
          CERTIFICATE_PASSWORD: ${{ secrets.CERTIFICATE_PASSWORD }}
      - name: Add Windows certificate
        if:
          matrix.os == 'windows-latest' && startsWith(github.ref, 'refs/tags/')
        id: write_file
        uses: timheuer/base64-to-file@v1
        with:
          fileName: 'win-certificate.pfx'
          encodedString: ${{ secrets.CERTIFICATE_WINDOWS_PFX }}
      # - name: Setup flatpak
      #   if: matrix.os == 'ubuntu-latest' && startsWith(github.ref, 'refs/tags/')
      #   run: sudo apt install flatpak flatpak-builder elfutils
      - name: Make
        if: startsWith(github.ref, 'refs/tags/')
        run: yarn make
        env:
          APPLE_ID: ${{ secrets.APPLE_ID }}
          APPLE_ID_PASSWORD: ${{ secrets.APPLE_ID_PASSWORD }}
          WINDOWS_PFX_FILE: ${{ steps.write_file.outputs.filePath }}
          WINDOWS_PFX_PASSWORD: ${{ secrets.WINDOWS_PFX_PASSWORD }}
      - name: Release
        uses: softprops/action-gh-release@v1
        if: startsWith(github.ref, 'refs/tags/')
        env:
          GITHUB_TOKEN: ${{ secrets.GITHUB_TOKEN }}
        with:
          files: |
            electron-app/out/**/*.deb
            electron-app/out/**/*.dmg
            electron-app/out/**/*Setup.exe
            electron-app/out/**/*.rpm
            electron-app/out/**/*.zip
Some of this is specific to our needs for Swach, and specific to both ember-electron and electron-forge usage, but most of it is generally applicable to any Electron app builds, so hopefully you can tweak it to work with whatever your setup may be!
Interested in building your own cross platform app? Ship Shape has extensive experience with Electron apps and progressive web apps. Get help from the cross platform app experts! Contact us. We would love to work with you!